Learn how to use PostSheet + Google Sheets to send personalized
emails.
This allows you to effectively mail merge using Google Sheets.
10 min
Get started for free
Step 1: Sign in
To use PostSheet, you must first sign in using your Google account.
Click on the Sign In link at the top right corner of the screen and you'll be redirected to Google for authentication.
Select the Google account that you want to use and optionally give PostSheet permission to view your spreadsheets and to send email on your behalf.
Step 2: Create a new Campaign
A Campaign is the basic unit of work in PostSheet. It specifies where to read the data from (Google Sheets or Airtable) and what action to perform on each row (Send Email, Send SMS, etc.).
Click on the New Campaign link on the left menu to create a Campaign.
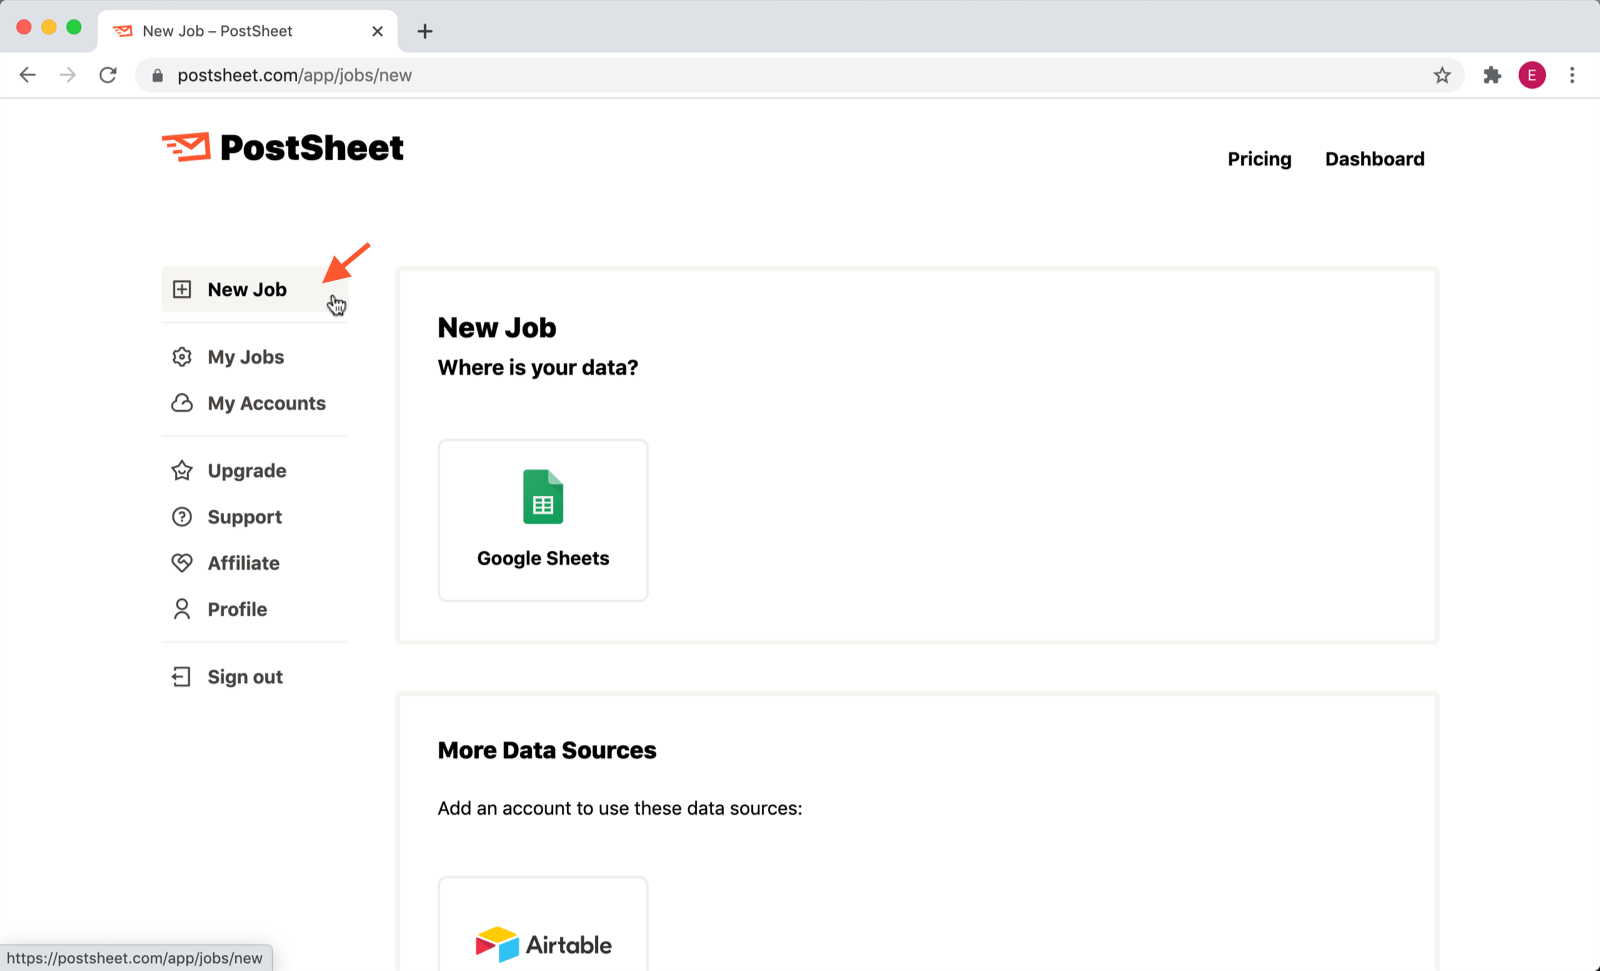
Step 3: Select your spreadsheet
Select Airtable as your data source.
In the next screen, select your base and your table.

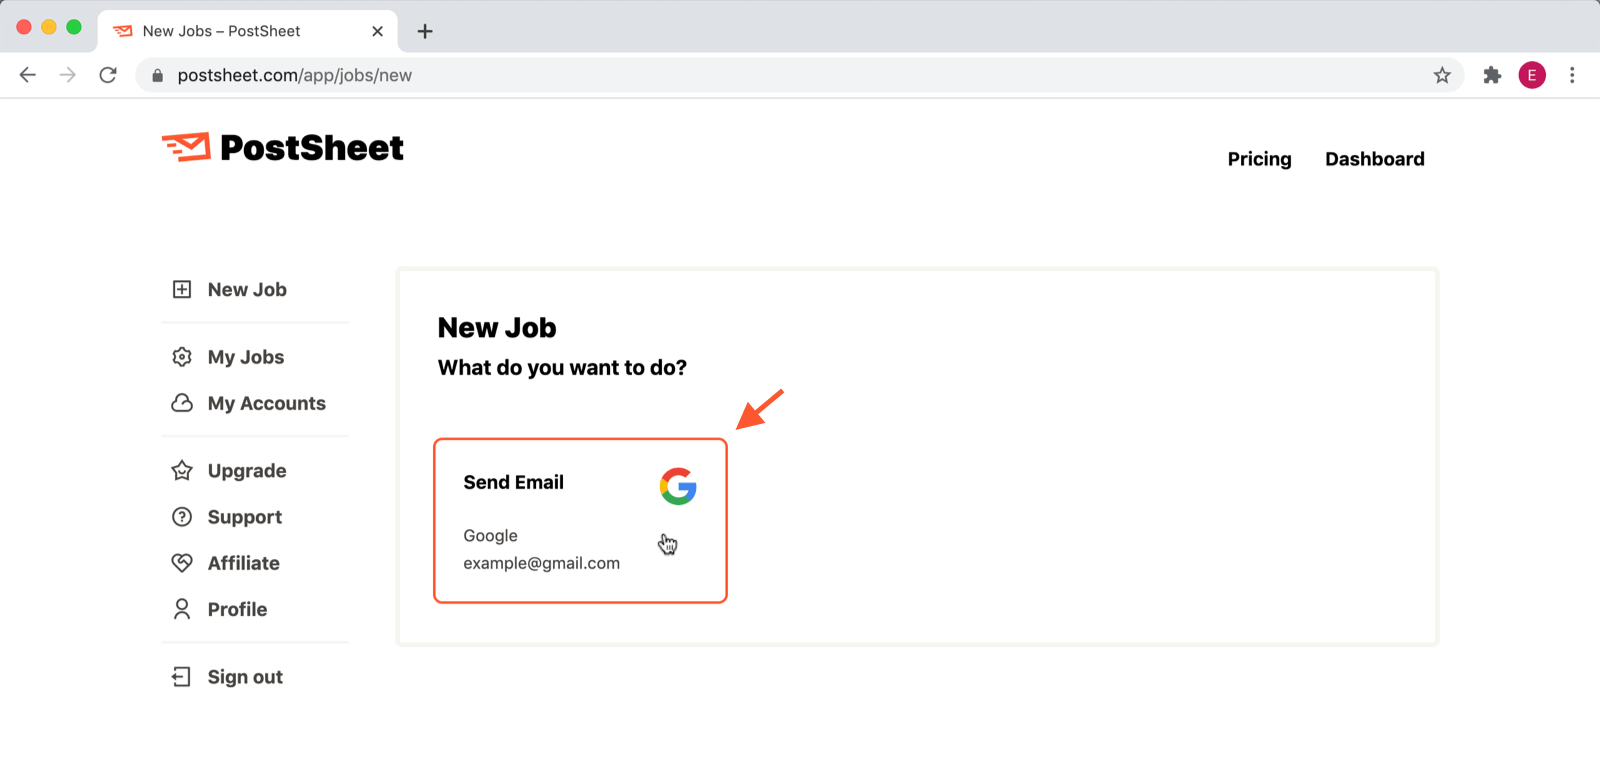
Step 4: Specify the action
Select Send Email with the service provider account that you want to use to go to the next step.
Step 5: Compose your message
Now you must write your message and specify how it must be customized for each row.
For the To Address field, select the column in your spreadsheet that contains the email addresses of the recipients.
When filling in the other fields, you can use the buttons at the top of the screen to insert placeholders like {{ Name }} into your text. These placeholders correspond to the columns from your spreadsheet and will be replaced with the actual values from each row.
For example, {{ Name }} will be replaced with the contact's name and {{ Address }} will be replaced with their address.
Step 6: Preview
PostSheet will show you a preview of the final message using the first three rows of your spreadsheet.
Make sure everything looks good.
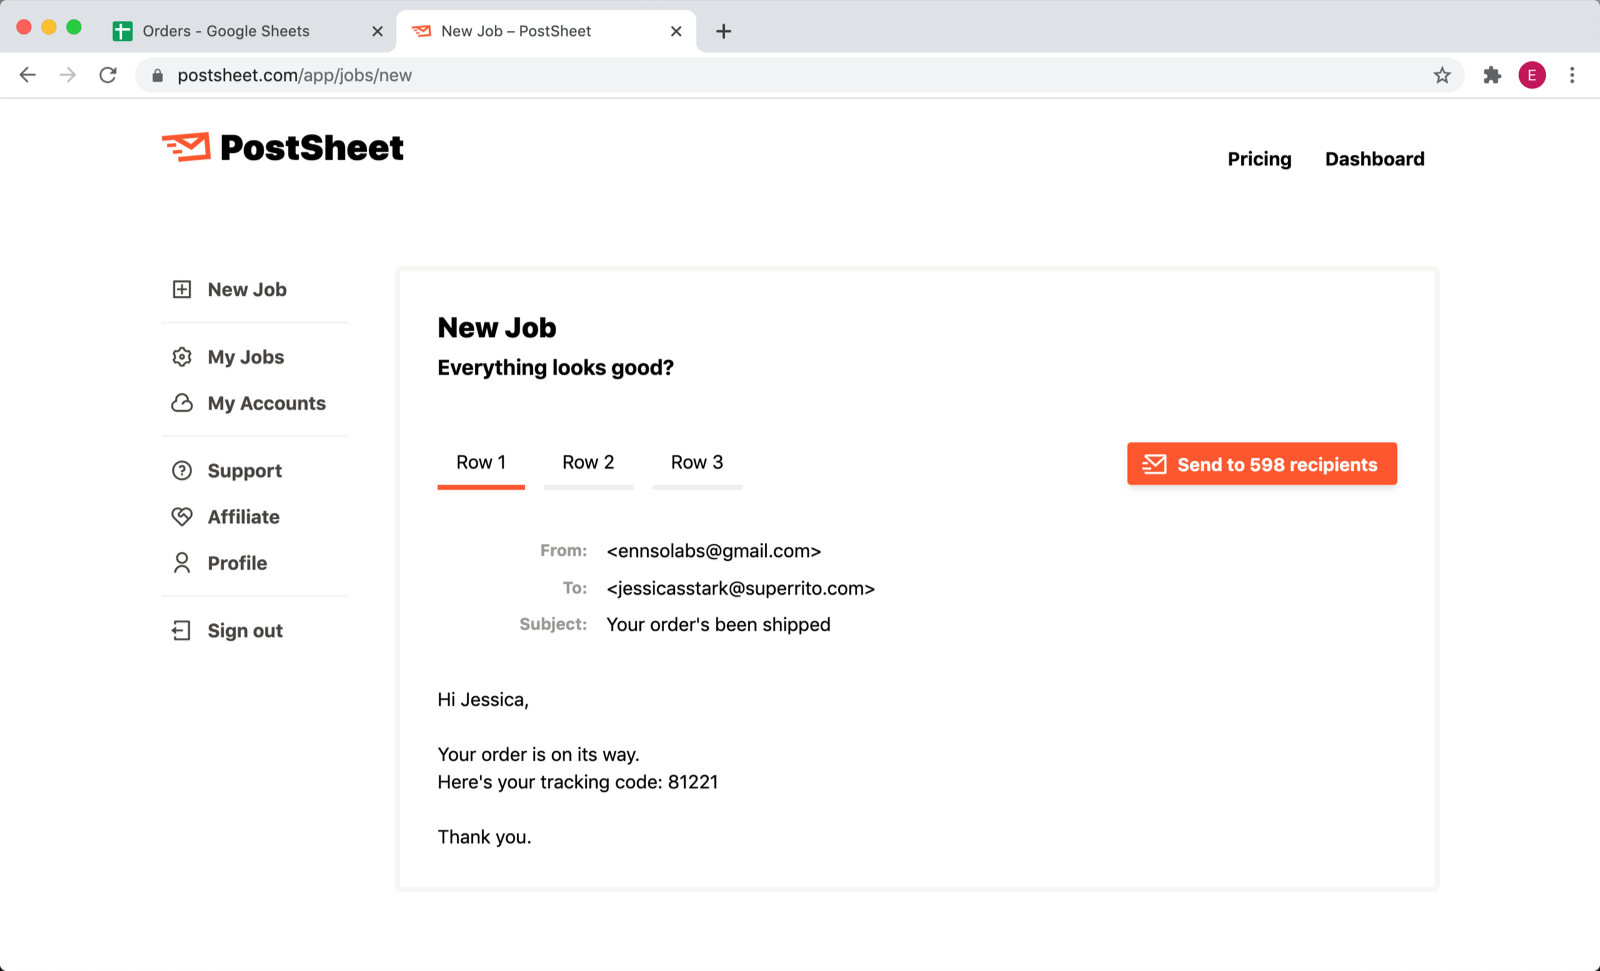
Step 7: Send
Click on the Send button to start sending.
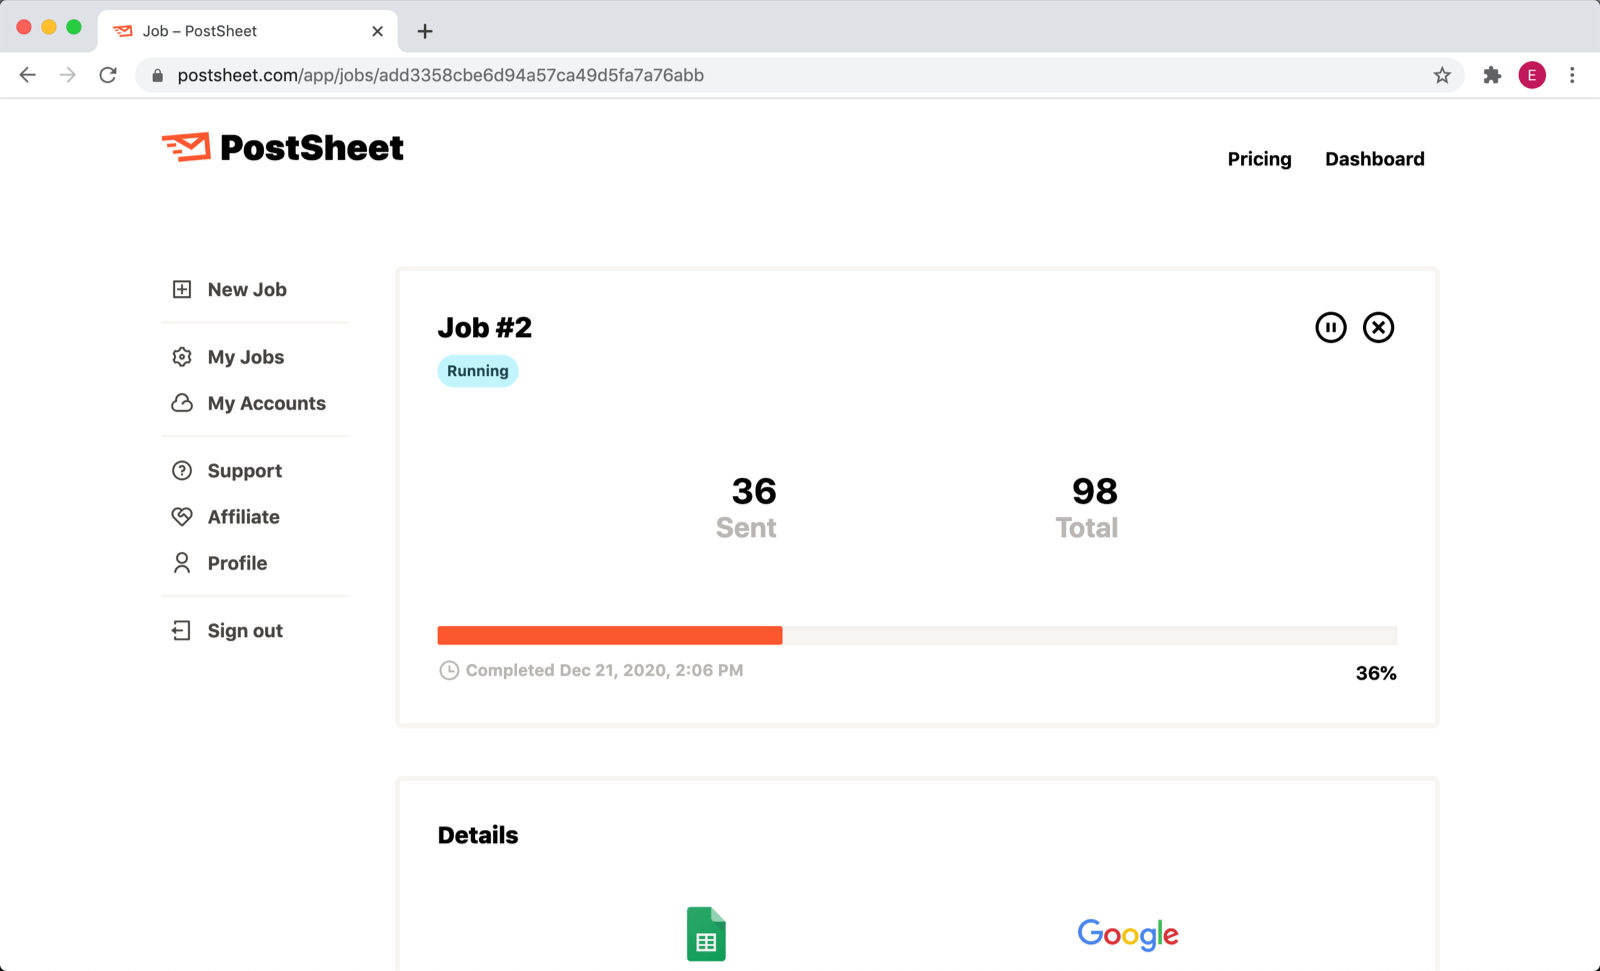
PostSheet will show you the progress and you can click on the total number of items to see more details.
Need help?
If you need help or have any questions, please contact via [email protected].